Taping the Drywall

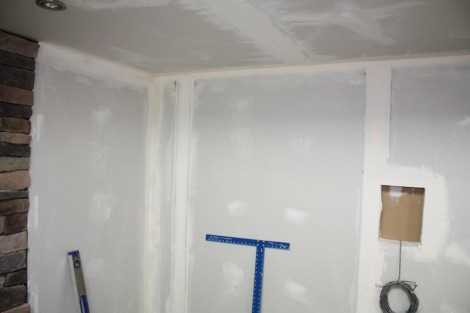
This is easily my least favorite part of any remodeling project.   Turning those nice sheets of drywall into a finished surface ready for paint is a tedious, messy job.  First you have to put some joint compound down and then embed the paper tape.  Then you have to cover the tape, and the screws with a few coats of compound.  Ohh and unless you’re really good you have to sand it after each coat.   Which puts a nice coat of white dust throughout your entire house.  It sounds easy enough, and doing it for a small area is pretty easy.   Scale it up to a whole room though, and its a pain, particualrly when half of its on the ceiling.

Sheetrocking!

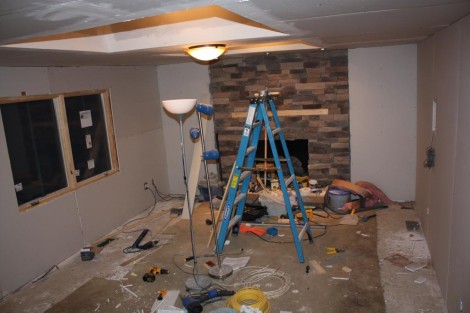
This past weekend Jess and I spent most of our free time hanging Sheetrock.  This is a great step because the room is finaly starting to look like its getting close to being finished.  Of course this also means that I’ll soon be doing lots of taping, sanding, and spackling, which is the least fun part of the whole process.  We got almost all of the walls done, and would have been able to finish, except we ended up being one sheet short of drywall.  Although I had orginaly bought what I thought was five sheets extra, that was before our plans included the skylights, which ended up using three sheets each.  I’ve used 1/2″ drywall for the whole room, attachign it to the studs with 1-5/8″ drywall screws.  I started using just a cordless drill but after a short time I bought a Bosch drywall gun.  Certainly one of the more useful tools I’ve bought recently, it makes sinking the screws to the perfect depth a cake-walk.

Cornerbead around the skylights

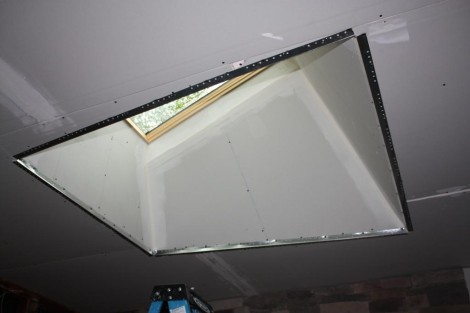
Well I haven’t been able to get much done on the family room in the last two weeks since I was getting ready for a friends wedding.  However now that he is all happily married and off jaunting around the Mediterranean on his honeymoon, I get to go back to work!  I’ve started with finishing the drywall on and around the skylights.  I already put a layer of joint compound on the inside corners, and now its time to do the outside corners.  I’ve added some metal corner bead on them to keep the corners looking straight and sharp.  Next I’ll cover them with a few coats of mud, and then sand them up.