Insulating the Wall

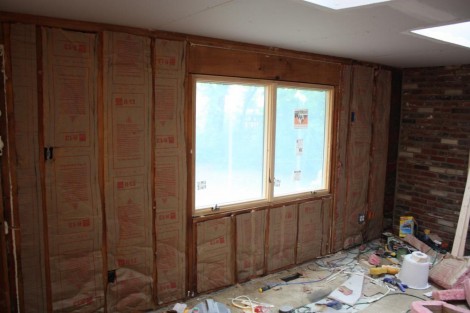
The next step in making the family room nice and warm after I’ve sealed any potential air gaps is to install fiberglass bat insulation into the wall cavities.  This is quite simple, the insulation comes in a nice roll and cuts very easily with a sharp knife (the sharp part is key as a dull knife will tend to tear instead of cutting it).   Owens Corning seems to have vastly improved the Pink Panther insulation, as I had no issues putting it up without wearing gloves, even with my soft “spends all day sitting in front of a computer” hands.  This is certainly not the case with the old stuff that I pulled out, as just looking at it makes me itch.

I’m actually not finished with this part yet, I still need to unfold the kraft paper flaps that cover the studs and staple them up.  This should further help prevent air infiltration, as well as prevent the insulation from sagging overtime.  I just need to throughly check the studs for any leftover nails from the wood paneling before I do that.
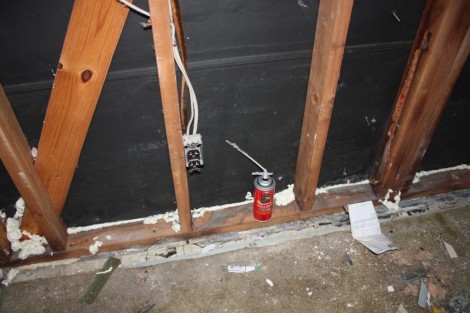
It’s Greeaaatttt!

When used properly Great Stuff expanding foam is an awesome substance.  it sticks to pretty much anything, expands into gaps, and is water-proof.  Its designed to be used to insulate in little gaps and cracks that are two small for regular types of insulation.   Although it probably has a decent R-Value, its far to expensive to be used in any significant thickness, and is much more useful at preventing air leaks.   I used it on this outside wall to make sure that all the gaps along the bottom of the sill plate were plugged (some bugs had previously found that they weren’t)  as well as to seal around the sheathing where holes were cut for lights.  Ohh and if you’ve ever gotten this on yourself,  a little acetone before it dries takes it right off.  Just don’t let it dry because once it does its practically impossible to remove.

Insulating the Skylights

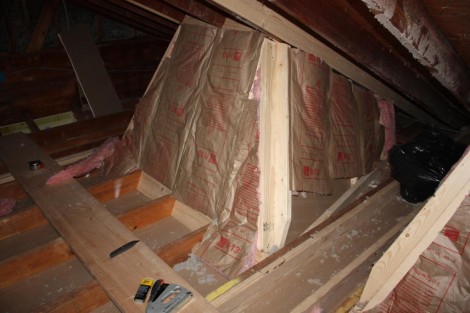
The old attic was just a nice flat roof that originally had some blown in fiberglass in it.  At some point the previous owner had added some fiberglass rolls on top of that, and then this past fall in a poorly timed project I blew in another 12″ of cellulose.   After taking that all out and redoing the ceiling, its now time to put some insulation back in.  I’ve saved all the blown in stuff,  but that won’t work for the nearly vertical sides of the skylights. For those I’ve used a base of R13 Fiberglass, running in between the framing.   This required alot of cutting as few of the studs are 16″ apart, and parallel.  I also realized too late that I should have done the far end before putting up the sheetrock, as its almost impossible to get in there now.   With this insulation in, I’ll use my air compressor to blow the rest of the insulation back in, as well as a wrap the skylight ‘tunnels’ with a roll of R30 fiberglass.  This should give me R43 on the vertical surfaces, and R50 or so on the horizontal.

Fireplace Stone

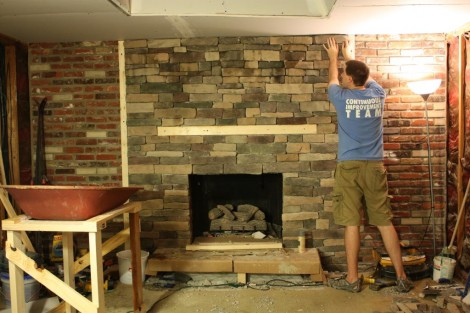
The stone veneer that I’ve been talking about putting up for the last couple of posts is mostly finished now.  We put the last piece for the wall up last night.  I still have to put the pieces around the hearth, but that needs to be built up some more before I can do that.

Once we got past the sides it went pretty quickly, we did it in 5 sessions each only an hour or two.  The last row was by far the biggest pain.  Picking out the last 4 or 5 stones was espicaly difficult, since not only did they have to be just the right height, and length, but we also were running low on stones to choose from.  And then to make matters worse, once we had finally gotten everything to fit, I managed to drop and break one of them.

I think it looks pretty nice, although there are one or two gaps that are a little bigger than I would like.  You can also see some more in work shots over in the Gallery.

Starting the fireplace!

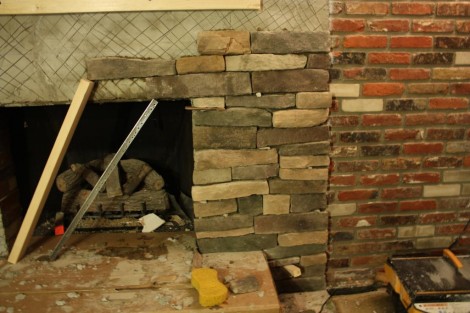
After much preparation, (picking the stone, getting the stone, lathe, scratch coat…) we finally started putting up the stone yesterday.  We started by laying out about half of the stone on the floor.  This way there were plenty to pick from, as well as mixing the different boxes (which could vary in color) together.  Then we started what is basicly a giant jigsaw puzzle.  Since the stones can’t really be cut (unless the end isn’t going to be seen) each stone must be fitted perfectly into place.  We had decided to do a ‘Dry Stacked’ layout, where there is no mortar in between the stones, so the gaps have to be as small as possible.   Jess did most of the stone picking while I spent most of the time buttering and placing the stones.  In this fashion we were able to get this much done in an hour or two.

Scratch Coat

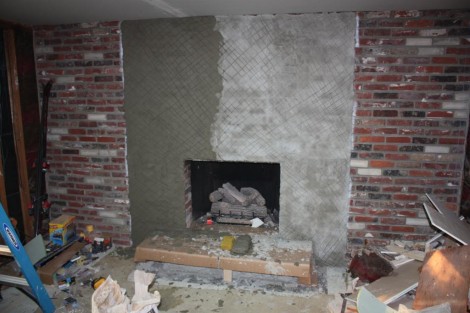
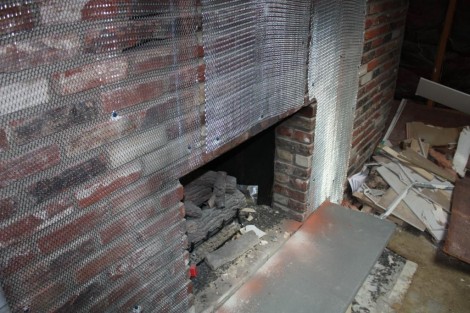
To put up the stone veneer over our brick wall, its recommended to put a scratch coat up first.  So after putting up the metal lathe, I’ve covered it all in a mixture of 1 part Type N Masonry Cement to 1 part All-purpose Sand.  Mixing up the cement and applying it was pretty tiring so I did it in two separate coats (one of which is still wet in the picture).  I was happy to see that it dried well and is securely fastened to the wall with no voids.  I was a bit concerned that I wouldn’t be able to get enough mortar through the lathe to fill the gabs in the brick.

I also learned  that I apparently hung the metal lathe in the wrong direction, its supposed to be put up horizontally, and in a particular direction so that it holds the mortar better.  Fortunately this didn’t seem to cause any problems.  To help the mortar adhere to the scratch coat you are supposed to ‘comb’  (or scratch i suppose) the scratch coat, to allow the mortar to adhere better.  However since I didn’t have cement comb, I just put some grooves in it with the tip of my trowel.

Metal Lathe

The current fireplace is set in a rather hideous brick wall.  After contemplating it for a long time I’ve decided to leave the brick wall up rather than take it down.  Although the discussion went through many phases, it came down to it not being worth the hassle/cost to dispose of the wall to gain the 3″ of space in the room.  That means we’ll be putting the stone veneer directly on top of the brick.   Eldorado Stone does say that if the brick is in good condition, and clean you could just put the stone on top of it, without any further preparation.   However if the bricks are painted they recommend putting metal lathe and a scratch coat on top first.  Although our brick isn’t painted, it does have soot, and some old mortar (it appears the bricks were reclaimed, or at least made to appear that way) on the front, so as you can see I’m going with the metal lathe.

I’ve used some masonry screws to bolt the lathe into the brick, and trimmed it around the fireplace and the bluestone.   Drilling holes in brick is surprisingly easy, even without a hammerdrill.  Even the carbide tipped masonry bits do get dull rather quickly though, and I’ve gone through a couple already.   I should also point out that you need to be careful to not over torque the screws, as they will break, and your hand will go slamming into the rather sharp metal lathe, which will take a nice gouge out of your knuckle and get blood all over your nice new bluestone.  Not that this happened to me or anything though.

Mortar

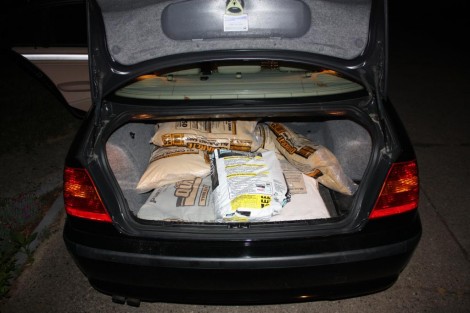
The family room is getting some nice stone for around the fireplace, and stone requires mortar to install.  Mortar comes in many different types (the main ingredients being cement and sand), but they’re all dirty, and they’re all heavy.  For our fireplace we got a 94lb bag of Portland cement, a couple of 70lb bags of Type N Masonry Cement, and a 50 lb bag of thinset.  In addition we got a handful of 50lb bags of sand to use as aggregate.  Now since I’m not a civil engineer I haven’t taken any classes on Cement, so I’m just going by the manufacturer’s recommendations.  Eldorado Stone recommends that the scratch coat be made out of 2 Parts Type N Masonry Cement, and 3-5 parts sand.  They also say that the mortar should be 2 parts modified thinset, 3 parts Portland cement, and 7 parts sand.    The only problem with all of this, is that all of these products are basically crushed stone, and are therefore all very heavy.  This means that we had about 600lbs worth of material in the trunk of my car, which is probably significantly more than it was designed for.

Bluestone Hearth

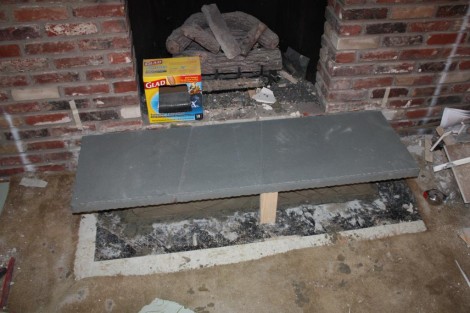
The hearth of our old fireplace was made of the same bricks that make up the wall.  For the new fireplace we ordered a nice big piece of Pennsylvania bluestone.   The 5’x18″x2″ piece of bluestone weighed in at about 250lbs, so once agian I called upon my friend Greg to not only transport the stone home, but to also give me a hand installing it.

I left a decent bit of the old brick hearth behind, so that I wouldn’t need to use that much mortar to set the stone in.  Once I decoded the nomenclature of the various Quickrete products they sell at Lowes, I was able to mix up some mortar using a 3-1 ratio of sand (All-Purpose as opposed to the Play, and Medium sand) and Type N Masonry cement.  I mixed it with some water till it was reasonably thick but still workable.  I’ve read that the most common mistake first-timers make when mixing cement is to add to much water, so I tried to avoid that.  Once the mortar was mixed (which was a surprising amount of work) I spread it on top of the remaining bricks, and then lowered the stone into place.  I used a small piece of 2×4 to keep the piece level while it setup.

Family Room Window

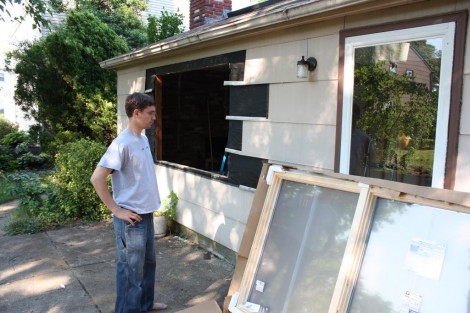
Since I’m starting to have a multitude of window installation posts, I’ll keep this one short.  Installing the window was straightforward, it fit well, so it was jsut a matter of removing the shingles, and the old window.  The new one was then lifted into place, shimmed to be square and level, and nailed in.   Despite these being Anderson windows I used some Pella Smartflash tape to seal the flange.  I’ve had good experiences with this tape before, and its available at Lowes.  The windows are Anderson 400 series casement windows.  The insides are unfinished pine, so that we can stain them to match the rest of the trim.  The casement windows will allow for more ventilation than a traditional double hung.  A benefit as this is the only window in the room.