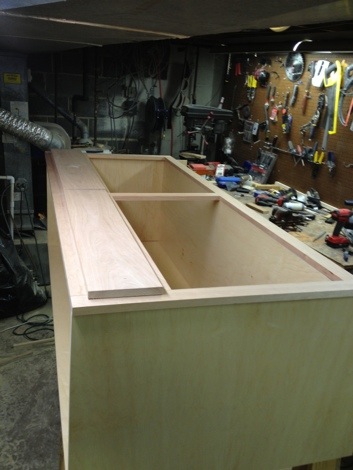
Carcass complete!

20121114-122107.jpg
I finished doing the carcass of the bathroom vanity. It’s constructed out of Pre-finished plywood. That means I dont have to muck around trying to put a finish on the inside of the cabinet after its all assembled. In addition the factory applied finished is much tougher than anything I could do in the shop. The carcass is made of 3/4″ plywood ao t will handle plenty of abuse and is constructed with dado’s and screws. I used my festool TS-55 track saw to make perfectly straight cuts, however they were not as square as I would have liked. I’m not sure why that is as I squared up the track each time before the cut. It is something I will have to pay attention to in the future.

Making the sawdust

20121112-141749.jpg
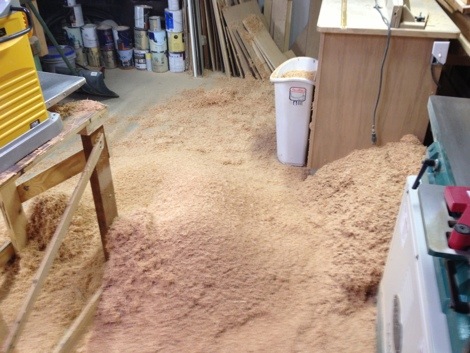
All of the wood I’ve been getting recently comes from Hearne Hardwoods, a lumberyard in south eastern PA. All of their lumber is rough sawn to about 1″ thick. This is know as 4/4 and when milled down it becomes 3/4″ thick. When the boards are sawn by the mill thy are still green from the tree and after being dried they can cup, warp or bow a bit. By removing a 1/4″ of material this allows you to end up with a perfectly flat, straight board. Downside of it is that you create an awful lot of sawdust. Since I dont have a dust collector this all ends up on the floor of my shop.

Bathroom Vanity

20121102-224503.jpg
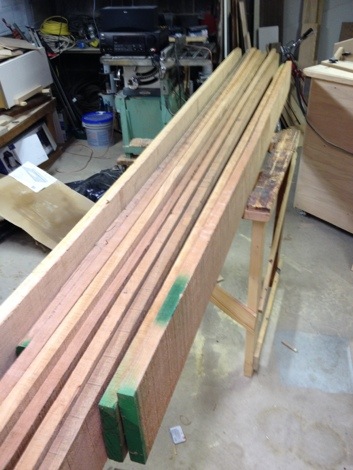
Starting a new project today. I’m building a bathroom vanity for the upcoming remodel of our main bathroom. I’m going to make the bathroom out of pre finished plywood, using the $300 worht of Cherry shown here to make the face frame and doors. I’m going to take a bit of a short cut and buy the drawers custom made (but not assembled) to try and save some time. I found a company, uniquedrawerboxes.com that will make up the boxes and ship them for about what it would cost me just in material.

Bathroom’s Finished!

Entrance

Well after a few months the bathroom is finally all finished. Took a bit longer than I excpected it, which I suppose is not suprising. It was really the tiling that slowed me down, cutting and setting the tiles was a real pain. Ohh and the 7 coats of paint in three colors certinly didn’t make things go any faster.

All in all though we are very happy with the results. I’m also quite glad that I did it all myself. it was a great learning experience, and I think everything turned out wonderfully. I also can’t imagine how people did things in the olden days (read: pre-1998). Without the folks over at the John Bridge Ceramic Tile Forum I doubt I would have gotten through it. Thats not to say that I didn’t look in books and ask friends and family for help too, but the books can’t anwser your questions when things are a bit peculiar, and sometimes your friends and family don’t have all the answers (all though they were also quite helpful!) .

Lastly I’ve found one of the biggest problems is trying to take a good picture of the bathroom. My camera is a tiny little point and shoot which is great for taking with you, but it has a rather narrow field of view, and with such a small room its hard to get a good shot. What I’ve done for this picture is to take a slew of smaller ones, and stitch them together to try and show the whole room (which of course makes for some oddities in the photo.

Green Bathroom!

green.JPG

Well the color saga is finally over (I hope).  After picking our first color, that was supposed to be blue-gray, and turned out purple, and our second color that just didn’t really match our tile, we’ve finally settled on this nice green color.  We also switched paints for this color.  Typically I’ve just used the Lowes brand called Valspar.   Most of the time I’ll just use the regular stuff, but for small applications I generally get the the Valspar Premium, which in semi-gloss runs about 30 bucks a gallon.  This time however we got some Benjamin Moore Regal semi-gloss instead.  It was quite pricey, at $45 a gallon, however it is noticably better than the Valspar Premium.  The Valspar is quite thick which helps it cover well, however it also seems to make it more prone to drips.  It seems that while you’re painting it will look fine, but after I’ve finished I’ve gone back and found drips where I had none before.  The Benjamin Moore paint covers just as well, but its not nearly as thick, and thus doesn’t seem to have as many drips.  I’m not sure its worth the significantly higher cost, but it does seem to be good stuff.

Broken Glass

Well this is what happens when you attempt to put a screw just a tiny bit to close to tempered glass.  I was in the midst of putting the shower door up, and was screwing this panel in.  I drilled a hole for a screw in the upper left hand corner, but it seems it was just a tiny bit to close to the glass, and when i put the screw in it shattered it.  If it had just been regular glass it would have probably just put a little chip in it, but it was tempered glass, so the entire panel instantly shattered, with no piece being bigger than 1/4″.   Hopefully it won’t be to hard (or expensive) to get a replacement.

Blue bathroom!

After realizing that the Purple wasn’t gonna cut it, we quickly ran over to Lowes and grabbed some nice blue paint (that’s actually blue!) and threw a few coats of that up.   Initially I was quite happy with it, sadly Jess was not.  She thinks that while its a lovely color it doesn’t match anything.  After looking at it a few times, I’m beginning to agree with her.  We’ll have to see what I think in a week or two, but we may end up painting it a third time.

Purple Bathroom?

Picking out a paint color is always hard.  You only get the tiny little paint chip to go by, and it always ends up looking different when its on the wall.  We picked out what I thought was this nice blue-gray color.   As soon as we put it up I quickly realized that it wasn’t blue, it was purple.  This made me none to happy as I really don’t want my fancy new bathroom to be purple.  Guess its time to head back to Lowes and see if we can pick a better color.

Dusty

I hadn’t wanted to do any more spackling without the grout being done, for fear that the spackle would get into the grout lines.  Now that its all finished though, I finally got back to spackling.  The biggest challenge was the transition from the cement-board to the sheetrock.  The Durock was about 3/16 higher than the sheetrock so I had to feather that out with a significant amount of joint-compound.   I also had to tape up the corners, which although it went a bit better than the first time I did it on the wall in the bedroom, it still was tricky, and didn’t end up looking that good.