Tearing down the Ceiling

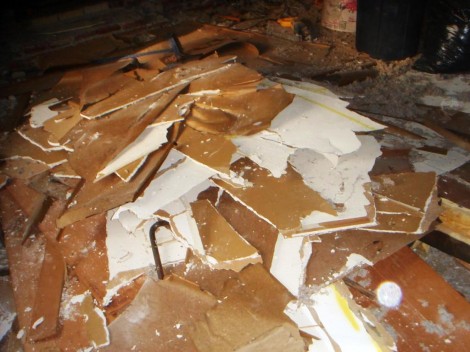
The ceiling in the family room had these fake wooden beams on it, as well as being covered with a rough texture.    To get rid of the texture the two choices are to either skim coat it with plaster, or to just rip it down and start anew.   Since we would have had ot remove a large chunk of the ceiling anyway for the new skylights, it was an eeasy decision to just tear it all down.   It was an easy job, as I was able to go in the attic and hammer down most of the drywall.  However that was just the start of it, as the cleanup would end up being far more work than just knocking it down.  Since we didn’t rent a dumpster I got some nice Glad Force Flex contractor bags.  Which although they were quite expensive (50 cents a piece), they don’t rip when you put 40lbs of drywall into it.  This made the job pretty easy, but it was still a lot more debris than I would have imagined.

New Kitchen Window

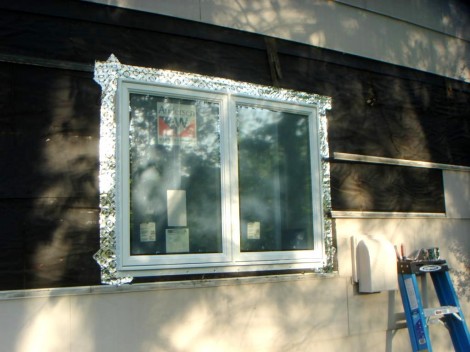
For the family room project we decided to replace the window, as well as add in the skylights.   Since we have two other windows in the house that are the same size as the one in the family room, we decided to go ahead and get those too.  And of course since that meant we were replacing one of the windows in the kitchen we figured we might as well replace the other one too.  Gotta have them all match you know.  Of course this had the effect of lopping another couple thousand dollars onto the cost of our family room, but thats life.

We decided to get Anderson windows this time, the decision was slightly arbitrary.  The windows seemed pretty much the same, I liked the interior finish on the Anderson better, but I liked the aluminum cladding on the Pella better.   Although I must say the $40 ‘Fuel surcharge’ that Pella wanted pissed me off.  If your delivery costs go up, raise the price of your delivery, don’t add on an extra fee and pretend its not your fault.  /rant

I did run into a bit of an issue with the installation, the window we got was the exact size of the rough opening, which meant there was no room for any shims.   The opening was pretty level and square so it shouldn’t be too big a problem.  If it is I’m going to have the walls all open in a few years when we redo the kitchen anyway so I can re-frame it then.

Stone Veneer

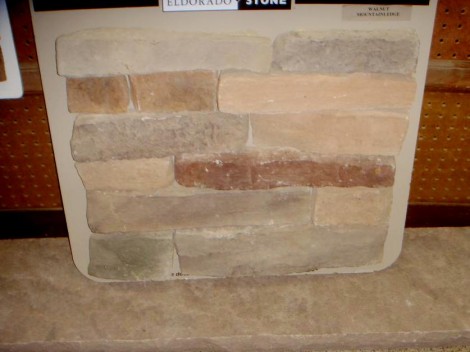
Around the fireplace in the family room we’ve decided to put up some stone veneer.  This will server to accent the area around the fireplace, as well as provide a fireproof barrier for the wall.  The stone is going to extend past the edge of the fireplace by two feet, which should give it some weight without taking up the whole wall.  This is the ‘stone’ we’ve chosen to use.  It’s not a real stone, its actually a type of concrete thats been died to look like stone.  There are a few advantages to this, the biggest one is of course cost.  Its like half the price of a real stone veneer.  The second is weight, the engineered stone as they like to call it is significantly lighter than actual stone, and is therefore easier to install, and doesn’t require as much reinforcement.  Lastly there is a much greater variety of choices available.  This is the one we’re going with, its from a company called Eldorado Stone, and is called Walnut Ridge.  The picture isn’t the best and the sample is a little dinged up but hopefully it will look great in the family room.  We’re going to match it with a Pennsylvania bluestone hearth, and a wooden mantle.

In with the new!

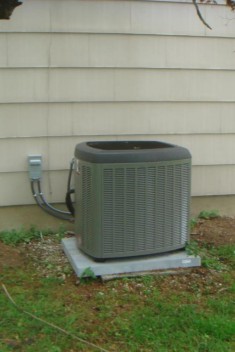
Last Friday the guys from the Rubino Service Company came by to install our new AC. Looks to me like they did a pretty good job, certainly worlds better than the old install. The new unit has a Lennox XC1, and an Aspen coil. I won’t be able to tell how well it works until it gots hotter and I can check out our electric bill, however I can say that it is impressively quiet. Its not silent, but its pretty darn close. It’s quiet enough that with the windows closed (which is pretty much all the time its running) you can’t here it running, and you can’t here it in the back yard at all.

The installation seemed to go pretty smoothly. It was generally a one-man job which surprised me a bit, but a small parade of other folks stopped by too. In addition to the guy who did most of the installation, another guy came to help move the unit and do some of the plumbing. A few hours after that an electrician showed up to check on how the wiring was going. Next the owner of the company stopped by to check on how things were going and then lastly the salesman showed up to make sure everything was done to our liking, and of course to get our credit card information. The only thing left now is to wait for the two rebates to show up.

Out with the Old AC

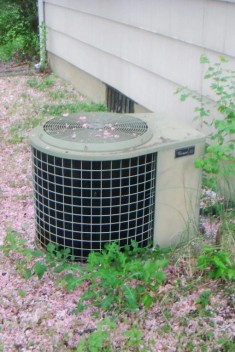
Our old central air conditioner has reached the end of its life. The name plate on the compressor is gone, so its impossible to tell just how old it is, but our home inspector thought it was more than 20 years old. It worked reasonably well for the first half of last summer, but it cost a fortune to run. Then around the beginning of August, the coil started freezing up. Reading up it sounded like the unit was probably low on coolant, and although that would be pretty easy to fix, we decided to get a whole new unit. After doing some reading everyone seems to say that the installer is the most important part of choosing a new AC, so we got quotes from three different contractors, Hutchinson Plumbing Heating and Cooling, Mount Laurel Heating and Cooling, and Rubino Service Company. We acutaly called a fourth company P.R. Sanders, but they didn’t call us back.

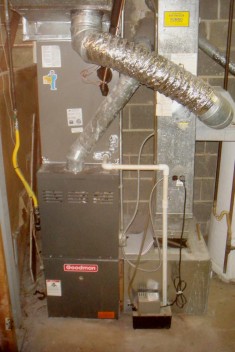
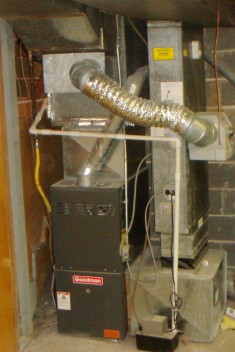
Unfortunately since we have a four year old furnace, that only has single stage blower we couldn’t get the most efficient AC, but we got quotes from each installer for both a high (~SEER 15), and a low (~SEER 13) efficiency unit. We also looked into getting a heat pump, but found that the NJ CleanAdvantage rebate, that would be worth ~$400 on an air conditioner, wouldn’t cover any heat pump we could get, which therefore made them far to expensive. I think this is a real travesty, as a heat pump is a more efficient solution, which is the whole point of the program. I made up a spreadsheet of the quotes, which can be found here, if anyone is interested.

Although all three of the installers seemed quite competent, and the prices were all similar we decided to go with the Rubino Service Company. They impressed me due to their excellent record keeping, as they were able to tell us that they had visited the house before (many years ago before the current system was put in), and what they did on what dates. And while the other two salesmen seemed to know their stuff, the Rubino guy was just a bit better.

Demolishing the Hearth

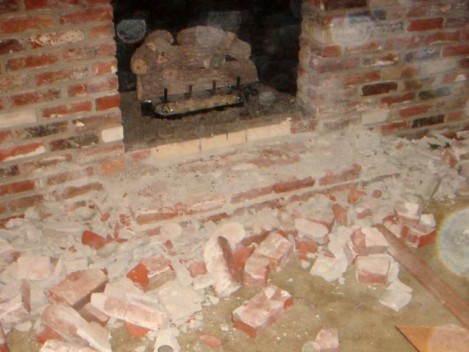
The plan is to keep most of the brick wall, for three reasons.  The first is that we don’t really have a way to get rid of all the brick, without getting a dumpster for $500.  The second is because at some later date, Jess thinks someone (certinly not me) might like to go back to the brick).  Lastly, and most importantly, it’d be way to much work to take down.  The hearth however, was a different story.  Since we’ll be putting stone veneer on the center of the wall, we wanted the hearth to match, and since we didn’t want to make it any bigger, the outer layer of bricks had to be removed.  I took my chisel and a sledgehammer to it, and with the help of my friend Greg, it was pretty well demolished in an hour or two.  Now I just have to figure out what to do with the 50 or so bricks and mortar.

Family Room Begins

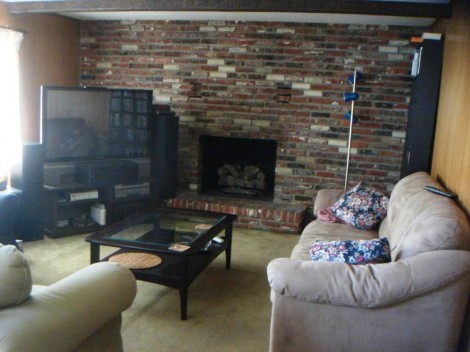
The family room has won the contest to be the next construction project for the spring!  Our current family room is very dark, and with wood paneling on all the walls, fake wooden beams on the ceiling, and incredibly ugly brick on the walls,  its also quite outdated.   This room, along with the kitchen and the master bedroom, are where we spend almost all of our time.    That means that we’re going to be putting alot of work into this room.

First thing to go will be all of the wood paneling, and the cieling.  There is no Sheetrock behind the paneling on the walls, so that will need to be added.  Normaly I wouldn’t bother with the cieling, but this one is textured, and has fake wooden beams across it.  Rather than attempting to skim coat or sand down the ceiling, we’re just going to replace it.  In addition we’re going to add in two big skylights to get some more natural light in.  The old aluminum window will also be replaced with a nice new energy efficient (read:expensive) casement window. The brick wall with the fireplace, will be covered up with some drywall, except for the center six feet or so, which will get stone veneer.  We’ll also be getting a nice new fireplace door, and a new hearth.  Lastly we will be getting some nice new carpet to keep our feet warm.

We’ve already got the skylights and windows on order, and will be ordering the stone veneer in the next week or so.  I’m starting the demolition this week, and hopefully will have the whole thing wrapped up before the middle of June, when it’ll be to hot to work in the evenings.

Fixing the roof

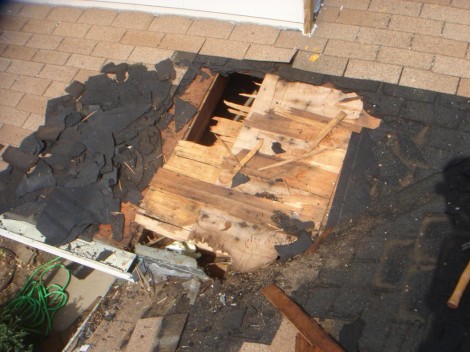
When we had our inspection the inspector noted that there was some water damage in the roof over the garage.  It looked like someone had tried to fix it with a can of Great Stuff foam.  Clearly not the optimal fix.  However, since it was over the garage, and didn’t ever leak really badly I had put off fixing it until now.  This weekend I ripped off a bunch of shingles to see just how bad it was, and surprise surprise, it was pretty bad.  The sheathing over the area was mostly rotted away, and most of the rest of the sheet was delaminated and in poor shape.  So I ripped up the shingles in the area, and replaced the piece of sheathing.  Unfortunately I’m not sure that this will really fix the leak.  It appears that the leak was actually occurring somewhere farther up the roof, where water was getting under the shingles and running down the top of the sheathing, until it got to the edge where it would then go into the garage.

Unfortunately I can’t tell where the source of the leak was, but I’m hoping that it was from the piece of wooden trim on the corner of the house.  This piece was entierly rotted away.  Where the base meets the roof (which you can just barely see in the top of the picture) there was nothing to prevent water from getting under the shingles.  I’ve since replaced that with a nice new piece of pressure treated wood, and I’ve caulked it to the shingles to prevent any leaks underneath it.   I’m hoping that between these two fixes it will stop the leak, at least until we get a new roof in another few years.

As always all of the in work pictures can be found in the gallery.

Planting

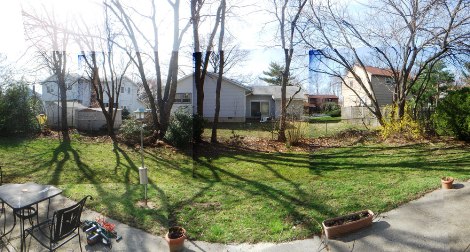
When we bought our house the landscaping in the backyard was in pretty poor shape. There were some nice things, such as a loverly lilac bush. But they hadn’t been taken care of and were all overgrown and weedy. Last year we didn’t have much time or money to spend on the backyard so I just trimmed it a bit and Jess planted a few flowers. This year however we have alot more time and a little bit more money. We aren’t going to go nuts and do the whole backyard at once, instead what we’ve done is cleared otu the worst areas, and just trimmed back some of the nicer bushes. This left us with a few nice spots to plant some.

On the left we have six plants, the little ones in the front are creeping flox, and I have no idea what the ones in the back are. Very helpful, I know. I rather liked the creeping flox, and not just because they have a cool name, but appartnly someone else did to, as it appears that someboday ate all of the buds on it. On the other side we planted 5 little rhododendrons. They are an unusual kind that have very little leaves, and the whole plant will only get 2-3ft big.

In the front yard we planted some bulbs, on the right, a whole bunch of tulips, and on the left some little daffodils, and some hyacinths. In between these we have some bigger bushes, and will also be planting alot of vegetables, as well as a pair of blueberry bushes.

Paint & Molding

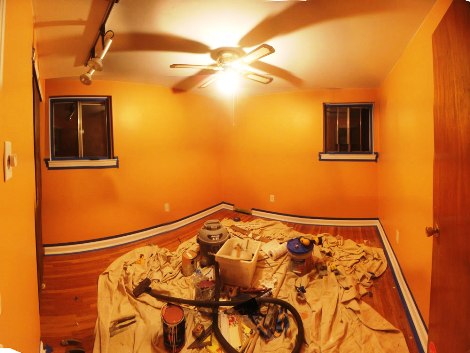
With guests coming this weekend time is short to finish up the room.  So I put up two coats of Tomato Bisque paint on Monday, and on Tuesday and Wednesday I got the molding all put up.  Painting went smoothly  although as always I had difficulty with the top edge.  I’ve used an edger, tape, and just a paintbrush to cut in the top corner, and haven’t really been happy with any of them.  I’ve found the best method is to find a friend who is really good with a brush.  Unfortunately since I was in a hurry I had to do it myself.  I went slowly and used a good brush and I think the results are acceptable.  I also think that in the future I should keep doing it this way as it seems that every time I get better at it.

Since this was the fourth room I was putting molding it went pretty smoothly.  Using a good miter saw, as well as a pneumatic nail gun makes it pretty easy.  However its still quite a bit of work since there are about thirty pieces and each on must be measured, cut, checked, and probably cut again.  In addition there were a handful of coped joints, as well as a few other tricky bits.  I’ve got it all taped now, and am about to paint it.