Router Table Fence

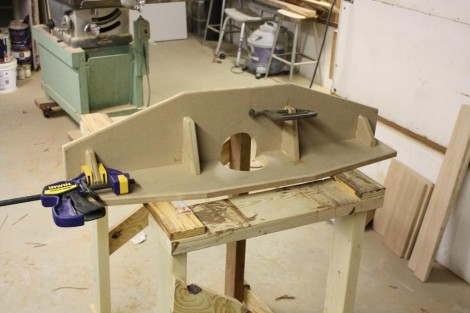
To guide the piece through the router, a sturdy fence is needed.  The New Yankee plans call for the fence to be made of MDF, which I assume is due to its stability.  The fence needs to be perfectly perpendicular to the router table, or the project might rock between them.  After cutting the pieces out of the sheet of MDF,  a round hole needed to be cut for the bits to stick through.   After making the rough cut with his sabre saw, Norm uses his fancy oscillating spindle sander to clean it up.  Since I have no such sander my cutout is a bit lopsided,  however it should work fine.  I chamfered the edge to allow the dust and chips an easier escape,  and also rounded over all the corners to make it easier on the hands.

The fence is put together with glue and screws.  Despite pre-drilling the screw holes with the proper size bit, I still managed to split two of the gussets.  I forced a bit of glue in the crack, and then clamped it shut (as seen above) and that seems to have held.  Next up I need to add a few adjustable pieces covered in laminate for the face of the fence, as well as some bolt holes.
Router Table Top

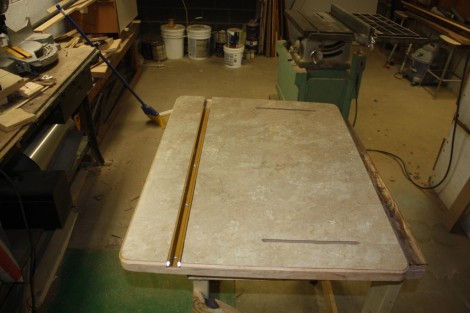
The first step in building the rotuer table is to build the top.  The easy way would have been to just get a piece of pre-made counter top and cut some slots and grooves in it.  But that wouldn’t have been as durable, or as much fun.  Instead the plans call for a 3/4″ MDF board, screwed and glued to a 1/2″ MDF board, trimmed in oak, with a piece of High Pressure Laminate (Formica) glued on top.

Lowes didn’t have any 1/2″ MDF, so I used plywood for the bottom, which I’m hoping will provide a more stable base.  They also didn’t have any white laminate, so I settled for this rather dull looking piece instead.  It gets glued to the top with some contact cement, and then the edges get chamfered to smooth them out.  Next I used a straight cut bit to make some channels to hold down the fence, and I used a dado set to cut the groove for the miter track.  I should have gotten the blue track, or a different color top, as it doesn’t really look very nice, but it should work quite well.

Router Table Supplies

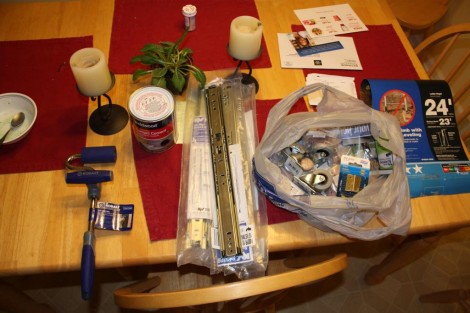
I’ve begun a new project, and of course the first step is to buy stuff!  This picture shows the plethora of hardware that is required to build my new router table.  I got the idea for this project after borrowing a friends tbale, and realizing it would be quite useful.  I got the plans from the New Yankee Workshop, so its a Norm Abram’s special.  The dvd and the plans were only 30 bucks so that I considered money well spent.  However these supplies plus the 4 or 5 sheets of plywood/MDF that are needed to build the table ring in at ~$350.  Keep in mind thats not including the router itself, the $75 ‘heavy duty’ Rockler router plate, or the $85 hardware kit.  Also keep in mind that you can by a commerical router table for $300 or so.    Of course its not about saving money, its about the fun of building my own table,  as well as hopefully getting a higher qualitly table.

Sawhorse

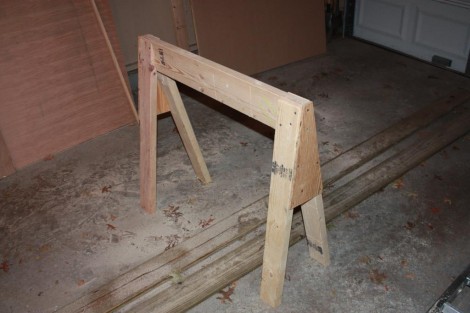
I’ve started work on a new project, that I will of course detail in a plethora of upcoming posts.   The first step of that project however was to cut some 4×8 sheets of plywood and MDF.   My table saw isn’t up to cutting full sheets like that so I’m regulated to using a circular saw.  For that I needed somewhat to support the wood, which led me to build a sawhorse.  I had already built a sort of table stand thing a few months ago (it can be seen in this post), so I only needed to build a single sawhorse.  I had some nice scrap 2×4’s laying around, so I used them for the legs, a scrap of plywood for the gussets on the side, and a nice big 2×6 scrap for the top.   I’m quite happy with how it turned out, I made it the same height as the table so I can use them together, and with the nice thick 2×6 top I don’t have to worry about running the saw through it.