Bluestone Hearth

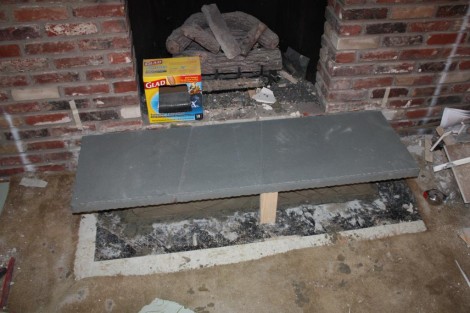
The hearth of our old fireplace was made of the same bricks that make up the wall.  For the new fireplace we ordered a nice big piece of Pennsylvania bluestone.   The 5’x18″x2″ piece of bluestone weighed in at about 250lbs, so once agian I called upon my friend Greg to not only transport the stone home, but to also give me a hand installing it.

I left a decent bit of the old brick hearth behind, so that I wouldn’t need to use that much mortar to set the stone in.  Once I decoded the nomenclature of the various Quickrete products they sell at Lowes, I was able to mix up some mortar using a 3-1 ratio of sand (All-Purpose as opposed to the Play, and Medium sand) and Type N Masonry cement.  I mixed it with some water till it was reasonably thick but still workable.  I’ve read that the most common mistake first-timers make when mixing cement is to add to much water, so I tried to avoid that.  Once the mortar was mixed (which was a surprising amount of work) I spread it on top of the remaining bricks, and then lowered the stone into place.  I used a small piece of 2×4 to keep the piece level while it setup.
Family Room Window

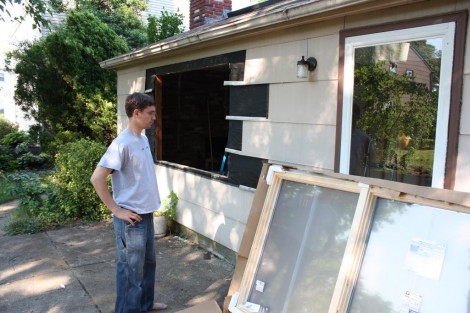
Since I’m starting to have a multitude of window installation posts, I’ll keep this one short.  Installing the window was straightforward, it fit well, so it was jsut a matter of removing the shingles, and the old window.  The new one was then lifted into place, shimmed to be square and level, and nailed in.   Despite these being Anderson windows I used some Pella Smartflash tape to seal the flange.  I’ve had good experiences with this tape before, and its available at Lowes.  The windows are Anderson 400 series casement windows.  The insides are unfinished pine, so that we can stain them to match the rest of the trim.  The casement windows will allow for more ventilation than a traditional double hung.  A benefit as this is the only window in the room.

My Pickup Truck

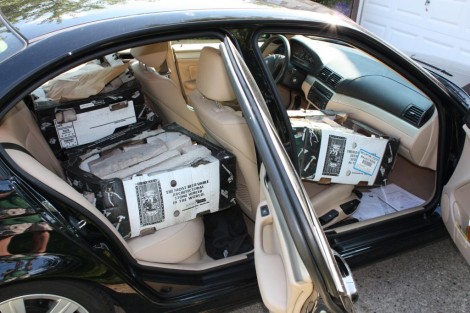
When I bought my car, I was living at home with my parents.  I needed to haul around my friends but not much else.  Thats why at the time a BMW 325i Sedan sounded like a great idea.  It could fit 5 people in reasonable comfort, and was fun to drive.  Heck I didn’t even get the fold down seats because “when was I ever gonna use that”.  Fast forward 5 years and now I really wish I had gotten a full size pickup instead.  Today I had to go pickup the stone veneer that will surround the fireplace.  Since I’d already bummed a ride off my friend to go pickup the five foot long, 250lb stone hearth,  I was stuck getting this myself.  5 Boxes, 80lbs a piece.

At the stone yard, the forklift guy starts laughing at  me, particularly after only one box will fit in the trunk.  I managed to get the rest in the car, and could have even fit a 6th box in the back seat!  Of course the waxy boxes did make a bit of a mess of the interior, but thats cleaned easily enough.

Sheetrock on the Skylights

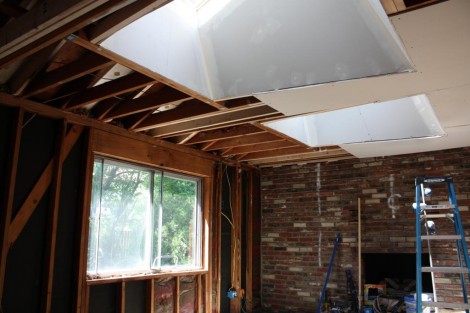
I’ve begun putting up the sheetrock in the skylight ‘tunnels’.  Cutting all these different pieces was quite the pain.  On most of the pieces there were no 90 degree corners, and out of the four sides, three of them require using more than half of a 4×8 sheet.  Of course I forgot about these tunnels when I bought the sheetrock a few months ago which means that even though I got five or six extra sheets, I’m probably going to run short now.

The tunnels also get extremely hot, since they are sitting right in the attic and the sheetrock traps all the hot air.  This makes me wish we had gotten the venting skylights.   Work will undoubtedly slow down now that I’ve hit the dull sheetrocking stage.  The taping of the seams is not a very fun task so I won’t be as interested in doing it, and therefore it will end up taking forever.

Soffit Vents

When my house was built it seems the designer did not realize the importance of having a well ventilated attic.  As such, the attic over my garage/family room  has only one gable vent.  On the other end of the attic is a wall, and there are no other vents in the roof.   The lack of additional vents renders the single gable vent useless, as there is nowhere for air to come in from.   The lack of ventilation causes two serious problems.  First, the attic becomes extremely hot, as all the energy from the sun beating on the roof has nowhere to go.  This will increase your energy bill in the summer, as the increased temperatures will cause an increase of heat transfered to the conditioned space in the house.  In addition the increassed temperatures will decrease the life of the roofing material.

Secondly, the lack of ventilation will cause a buildup of moisture in the attic, as the humid air leaks into it from the rest of the house.   Moisture buildup is never good, and in the attic it can cause a handful of problems including mold growth on the rafters (which was noticed by our home inspector).

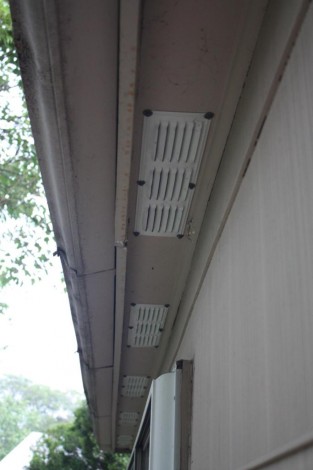
With the attic all open and easily accessable I’ve taken the opportunity to add in some soffit vents.  These vents will allow cool, dry air to flow up into the attic, and go out the gable vent.  This still isn’t ideal though, as the gable vent is only at the one end.  Therefore when we redo the roof, I’ll also be adding a roof vent and that will greatly increase the air flow.  Adding the soffit vents is quite easy, although all of the work is done over your head, which makes it much harder.  All i did though was to cut some square holes with a jig saw and then screw some vent plates over them.

Skylight Tunnel Framing

I decided to wait until the skylight was installed to finish framing the ‘tunnel’ through the attic.   The framing is really just there to support the Sheetrock that will be going up.  Since it doesn’t have a real structural purpose, it didn’t matter when I did it, and I wanted to make sure the skylight looked proper before going ahead with the framing.   Doing the framing was more difficult than I was expecting.   I hadn’t realized just how much lumber would be required to adequately support the drywall.  In addition to the sheer number of studs I had to add, a number of them were at complex angles require multiple measurements and tricky cuts.  Fortunately between my compound miter saw, and my circular saw I was able to cut all the pieces quickly and accurately.