Search Results for: window

More New Windows

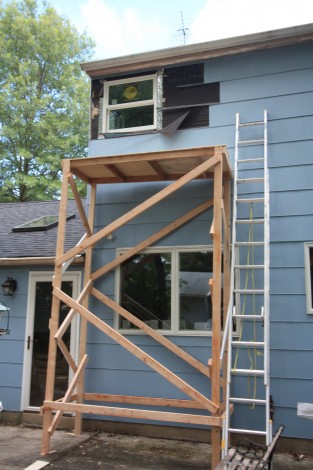
The windows that I ordered back in April have finally arrived.  They’re all going in on the second floor, so I decided to build this scaffolding.  It took about $40 worth of lumber from Lowes, and an hour or two to put together.  This gives me a nice stable platform to work on the windows from.  The scaffolding is  12′ tall, 3′ wide, and 7′ long.  It’s a very simple construction, with 4 12′ 2×4’s carrying most of the load, being braced a number of smaller 2×4’s to prevent it from twisting or buckling.  The top is simply some 1/2″ plywood that was actually part of the shipping crate of my jointer.  I used my framing nailer to put it all together which was quick and easy.  It’s a very stable structure, and its at the perfect height.

Staining Window Trim

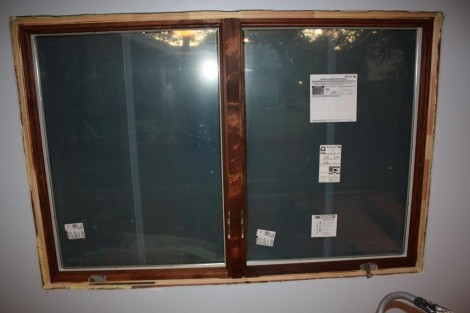
In the past I’ve always painted the trim in the other rooms of the house.  However for this room the wife decided that she wanted the trim to be all stained.   We picked out a nice dark walnut colored stain and proceeded to order all of our windows and skylights in unfinished pine.  I’ve stained pine in the past, and generaly have had good results, although it can get a bit blotchy.  I know you can use a wood conditioner overwash, however that also makes the end result be lighter, and we wanted it to look nice and dark.  All of the other molding we stained turned out acceptably, and the skylights turned out beautifully.  The Andersen window we got was quite the disappointment though.  The main rail looks terrible, and the bottom rails are quite different shades.  I suspect this comes down to the poor qualitly of wood used by Andersen in the construction of the window.    The good news however is that the center rail is acutaly just a trim piece tacked on with a few brads.  That meant that I was able to pop it off, and I can replace it with a higher qualitly piece of wood that should look great.

Family Room Window

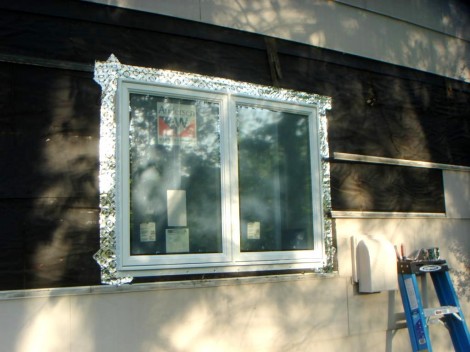
Since I’m starting to have a multitude of window installation posts, I’ll keep this one short.  Installing the window was straightforward, it fit well, so it was jsut a matter of removing the shingles, and the old window.  The new one was then lifted into place, shimmed to be square and level, and nailed in.   Despite these being Anderson windows I used some Pella Smartflash tape to seal the flange.  I’ve had good experiences with this tape before, and its available at Lowes.  The windows are Anderson 400 series casement windows.  The insides are unfinished pine, so that we can stain them to match the rest of the trim.  The casement windows will allow for more ventilation than a traditional double hung.  A benefit as this is the only window in the room.

New Kitchen Window

For the family room project we decided to replace the window, as well as add in the skylights.   Since we have two other windows in the house that are the same size as the one in the family room, we decided to go ahead and get those too.  And of course since that meant we were replacing one of the windows in the kitchen we figured we might as well replace the other one too.  Gotta have them all match you know.  Of course this had the effect of lopping another couple thousand dollars onto the cost of our family room, but thats life.

We decided to get Anderson windows this time, the decision was slightly arbitrary.  The windows seemed pretty much the same, I liked the interior finish on the Anderson better, but I liked the aluminum cladding on the Pella better.   Although I must say the $40 ‘Fuel surcharge’ that Pella wanted pissed me off.  If your delivery costs go up, raise the price of your delivery, don’t add on an extra fee and pretend its not your fault.  /rant

I did run into a bit of an issue with the installation, the window we got was the exact size of the rough opening, which meant there was no room for any shims.   The opening was pretty level and square so it shouldn’t be too big a problem.  If it is I’m going to have the walls all open in a few years when we redo the kitchen anyway so I can re-frame it then.

Window #2 is in

window1.JPG

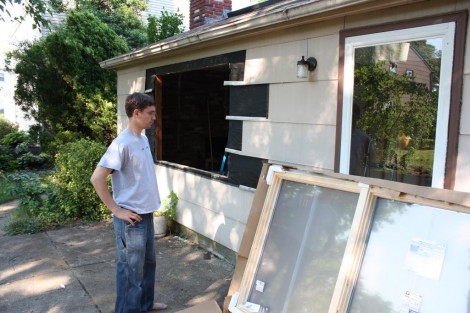
I managed to get window #2 in the other day.  I think it looks pretty good, although I need to put some wood trim around it.   Oddly it looks a bit crooked from the outside, however the window is dead level, so I’ll have to investigate if perhaps the shutters are crooked.  The window went in pretty easily once I had the opening all prepped.  Prepping the opening was a bit more difficult mostly due to the crappyness of the 2×4’s that I got from Lowes.  The bottom of the old window sloped out heavily and so the outside was much lower than the inside.  I wanted to frame up the bottom to bring it to the same height as the inside.  Should be as simple matter of taking a 2×4 and nailing it down.  Unfortunately the 2×4 was extremely warped, and even after throwing a  handful of nails into it, and a few screws (breaking my bit in the process) into it, I couldn’t get it to lay flat.  So finally I pulled it out, went back to Lowes and after going through a pile of lumber found a few boards that were reasonably flat.  Once I got those in, it went pretty smoothly.

New Window!

window1.JPG

The nice man from Pella dropped off our new windows yesterday.   The window that was in the bathroom was an aluminum sliding window, that was out of square, extremely dirty and horribly energy efficient.  With all the walls ripped out of the bathroom it seemed like a good time to replace the windows, and while I was at it I figured I’d replace all the windows on the front of the house as well.  We picked out some nice Pella Architect series windows, in the traditional style for our house.  I was quite happy to realize today that I would get a $200 tax credit for the windows due to their energy efficientness.

After three trips to Lowes I managed to get the first one installed today.   Once I had the shingles off it was actually fairly easy to install.   Unfortuantly getting the shingles off was a royal pain.  The shingles are put up in an  overlapping fashion, such that to get one out you pretty much have to take off the entire wall.  I managed to pry most of them out after some difficulty, however I did managed to crack two of them.   I have a few spares that I could use to replace them, however I’ll probably hold off on that until I paint the house.  Due to my expert measuring skills (well mostly luck I’m sure) the window fit perfectly, and since the opening was fairly square and level shimming it was easy as well.  The fancy Pella Smartflash tape that I used to tie in the window with the vapor barrier on the house also made life quite easy as it stuck to everything and was easy to tear.  I’m very happy without the windows look, and they’re also nice and quiet as well.

Day 5: Snow in Salzburg!

Last night we drove into Austria.  I was a bit nervous about going through customs but it turned out to be ill-founded as well, there weren’t any.  The EU seems to becoming more like the US all the time, as this trip was just as eventful as driving from New Jersey to New York.  When we woke up in our lovely hotel and looked out the window though, we were surprised to see a decent coating of snow on the ground.  I was very glad to have rented winter tires for our trip through the Alps, as I doubt this will be the last we see of the white stuff.

Salzburg is very nice little city, although a bit touristy.  We seemed to have more difficulty finding good places to eat here however, and the places we did find were filled with people smoking.   I’d forgotten how awful it is to go to dinner with someone smoking right next to you, it just makes all the food taste worse.

Salzburg only has 150,000 or so people in it, so its easy to walk around, and thats what we’ve been doing.  Today we walked through much of the old city, which besides for the names on the shops hasn’t changed much in a couple hundred years.  From there we took the cable railway up to the Fortress Hohensalzburg, which sits atop a large hill to the south of the city.  Its a huge fortification that looks pretty much impregnable, and not surprisingly has never been taken by force.  Of course for some reason they just surrendered it to Napolean.  After lunch we went over to the Cathedral Dom, which was originally built around 700 AD, and then rebuilt again in the 1500’s, and rebuild again in 1959 after it got blowed up in WWII.

Cutting Trim

I’ve been a bit lax in working on the family room lately, for a variety of reasons.  Firstly we moved the couch and the TV into the room, which of course meant that I could now relax and enjoy my new skylights.  Second, the new TV season has come around and laying on the couch watching TV just seems like more fun.  Regardless last night I finally got off my duff and starting working on the 2nd part of the trim work.  This includes the extension jams for the window, as well as the trim that goes around the pass through to the kitchen.  It’s all been cut, sanded and has a coat of stain on it now.

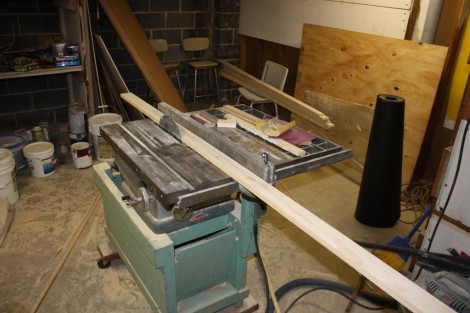
I’ve been using this sturdy Craftsman tablesaw, that used to be my grandfathers.  My mother tells me that he quit smoking for a year to save up for it, and I figure its getting near to 50 years old now.  I bought a nice new blade for, and it works pretty well, however the blade does seem to wobble a bit.  That means the cuts need a bit of sanding afterwards.  I’m not sure if this can be fixed or not, but I’m going to poke around abit and see.

Fixing my car

The family room is the second big house project I’ve undertaken, and I’ve realized that when I get going on a big project I tend to neglect the other little things that go wrong with other parts of my life.  For instance my car has developed a few minor problems, that I’ve put off until finishing the family room.   Well finally a big enough one came along that I had to take care of it.  The window regulator on the driver side door broke, meaning that the window wouldn’t go up or down.  Which of course was a problem since it was currently down. Happily, its quite easy to fix, with the new part being about $100.  While I was at it, I decided to replace the very worn and cracked shift boot, as well as the center arm rest.  All the work I’ve done on my car has been quite easy to do, thanks to the excellent design of my 325i.  As such after a couple of hours I had everything swapped out and looking good.  I didn’t need to run and get any special tools, or spend hours trying to get a rusted bolt off, which seemed like the norm any time I remember watching my dad to work on our cars.

Lights

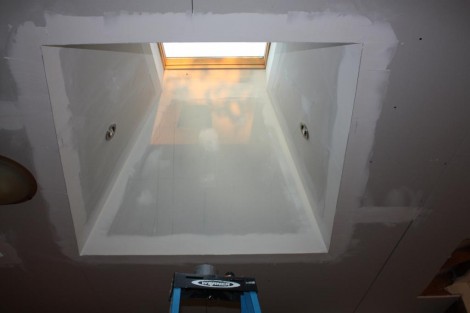
Lighting the family room has proven to be a real challenge.  The new skylights and window do a great job of letting light in during the day, but at night we obviously need something artificial.  With the skylights taking up a rather large portion of the ceiling and the ceiling also being rather low, that limited our options for light placement.   I’d been hoping to get some sort of fancy indirect lighting fixtures, and mount them inside the skylight tunnels, making it seem like natural light was shining down even at night.  However this abstract concept that I had floating in my head didn’t really seem to exist out here in the real world.     Although Lowes and Home Depot have a pretty good selection of lights, we initially couldn’t find anything we liked there.  So I hit up the phone book and it turns out there is only one other lighting store in my area, and after a quick trip over there we found that they didn’t have a significantly better selection than Lowes.  I then hit up the intertubes, and although LightingDirect.com has a vast array of lighting options, without being able to see them first hand we didn’t want to get anything.

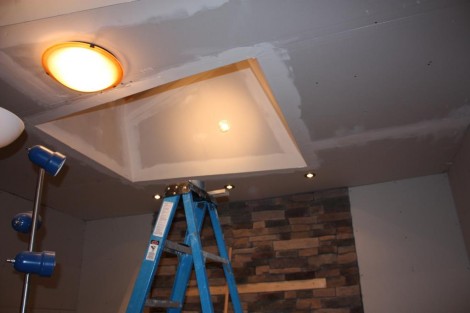
Fortuantly we started thinking about lighting pretty early on, and that gave us plenty of time to mull over our choices.   We finally decided that a shallow ceiling fixture would look ok, and provide the most light.  We also found these wonderful little 3″ recessed lights at Lowes.   We decided to mount three of them over the fireplace, and two in each skylight tunnel (see the picture below).  They are adjustable, and that meant we were able to aim the ones in the skylights so that they hit the opposite wall and reflect down.   Each one takes a 50-watt halogen bulb,  which combined with the center light, makes the room nice and bright.  The best part was that these recessed lights, including the bulb and the the trim (it all comes together) were only $12 a piece.   The only bad thing is that they aren’t airtight, and they aren’t IC (insulation contact) rated.  This means I’m going to have to do some extra work to insulate around them.